Blog

  • how much sun a vegetable garden really needs

    how much sun a vegetable garden really needs

    Introduction: The Importance of Sunlight in Gardening
    Introduction: The Importance of Sunlight in Gardening — how much sun a vegetable garden really needs

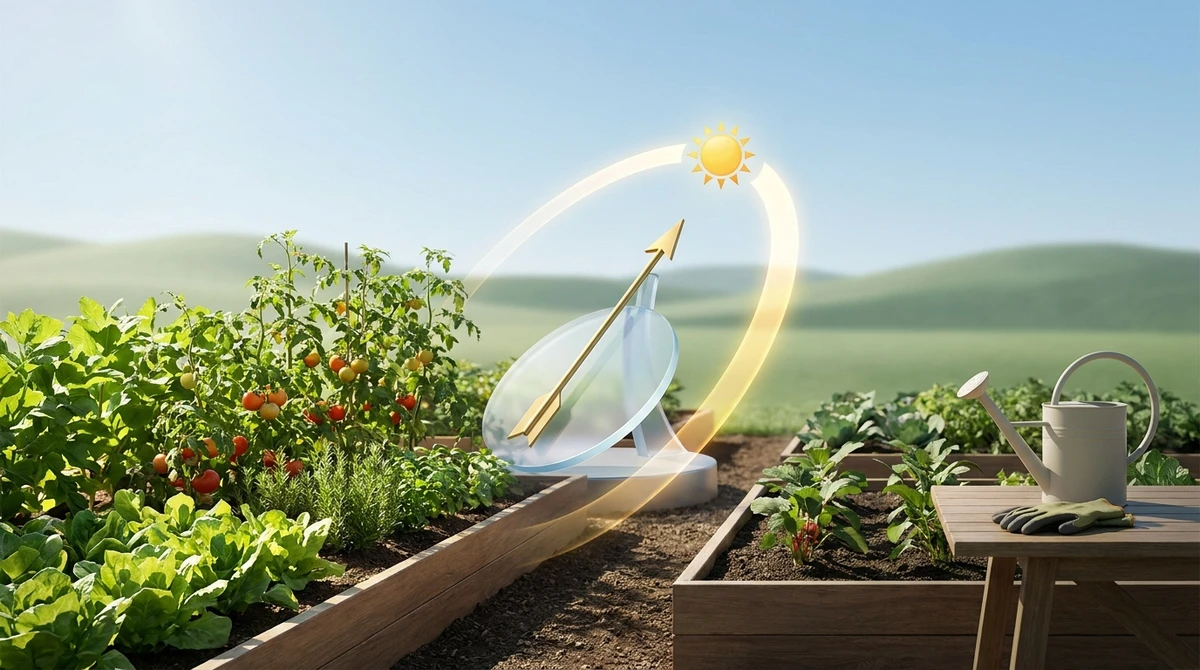
    A vegetable garden really needs six to eight hours of direct sun daily for most crops, though leafy greens tolerate as few as three to four. How much sun a vegetable garden needs depends on what you grow: tomatoes demand full sun, while spinach and lettuce will sulk and bolt in it.

    I learned the hard way, years ago, when I tucked a row of ‘Brandywine’ tomatoes along a north-facing fence line because the soil there looked promising. Dark, friable, full of earthworms. The plants grew. They flowered. They did not fruit. I waited and waited, watching those vines climb, until August reminded me what I had actually done: I gave them four hours of sun, and they wanted more. Tomatoes need at least 6 to 8 hours of direct sunlight per day to set fruit well, as the Old Farmer’s Almanac confirms plainly. My Brandywines never stood a chance.

    Sunlight is the engine of the whole enterprise, the thing that drives photosynthesis, water uptake, and the slow conversion of leaf into fruit. Yet most garden advice treats it as a single number, a flat prescription. “Full sun. Six hours. Done.” That has never matched what I observe in my own beds, where a plant’s performance depends on light working in concert with soil temperature, moisture, and the mulch that mediates both. Sunlight is only the first variable in that equation. I want to get into the nuance here, starting with what sun actually does for a plant and ending with the practical question of how to read your own yard.

    Understanding Sunlight Requirements

    “Full sun” means six or more hours of direct sun. “Partial sun” means three to six. “Shade” means less than three. The terms sound simple enough, but they hide a complicated truth: not every vegetable reads the same rulebook.

    Tomatoes need at least 6 to 8 hours of direct sunlight per day to set fruit well, according to the Almanac. I have pushed tomatoes into shadier corners in late July, hoping the relief would save the plants from heat stress, and I have paid for it in diminished harvests every time. Peppers, eggplants, and winter squash belong to the same demanding camp. Give them anything less than full sun and they sulk.

    Leafy greens, on the other hand, are forgiving. Lettuce, spinach, and arugula tolerate partial shade gracefully, and in the heat of summer they actually prefer it. A patch that catches morning light but falls into dappled shade by one o’clock will keep my lettuce from bolting a full two weeks longer than the open bed nearby.

    That optimum shifts with every crop, every latitude, and every cloud cover, which is why a flat number never tells the whole story. One gardener exploring the so-called magic amount of sunlight for maximum veggies puts it well: the right conditions matter more than any single measurement (cindyheathwrites.com).

    I will say more about how soil and moisture mediate that sunlight later, but the first step is simply knowing what each vegetable actually wants.

    The Role of Soil Health and pH

    Sunlight alone doesn’t grow a garden. My first raised bed sat in what I measured as a perfect eight-hour blast of afternoon sun, yet my peppers sulked and my spinach bolted before it was worth picking. The soil was exhausted. Compacted, starved of organic matter, and sitting at a pH I’d never bothered to test. Even the strongest light can’t compensate for ground that can’t receive what a plant needs.

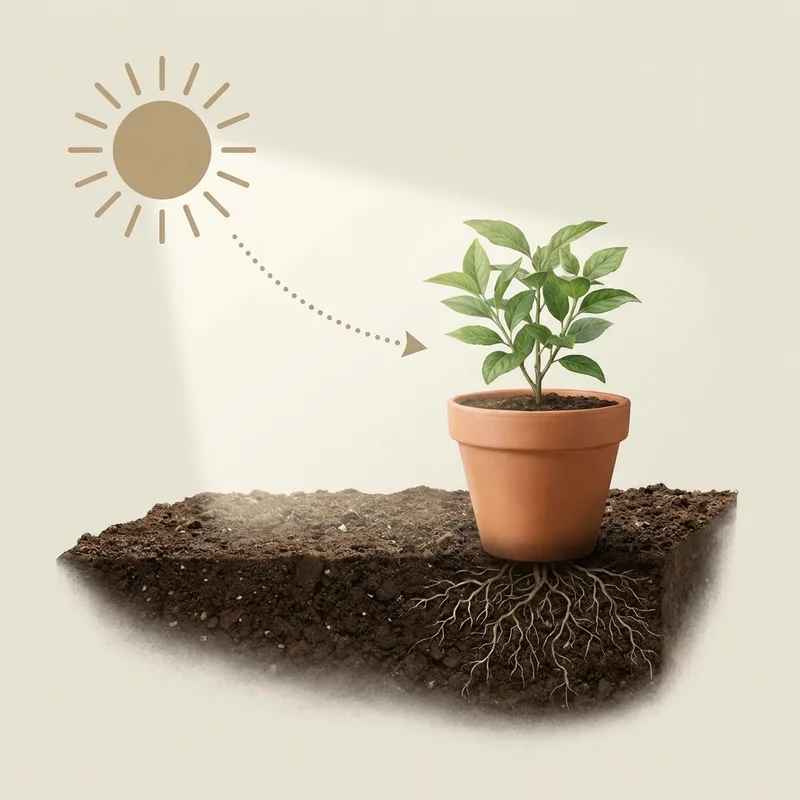
    Sunlight drives photosynthesis, but soil is the medium through which roots actually take up the water and minerals that photosynthesis converts into growth. When soil chemistry is off, the plant can be bathed in light and still fail to thrive. Most vegetables grow best in soil with a pH between 6.0 and 7.0, slightly acidic to neutral, as noted by Michigan State University Extension. Outside that range, essential nutrients become locked up. Phosphorus gets scarce in acidic ground; calcium and magnesium slip away in overly sweet soil. No amount of sun fixes what the roots can’t reach.

    In my own beds, I’ve watched a shift of half a pH point turn a struggling planting into a productive one. The tomatoes in my south-facing bed always outperformed the ones to the west, and for years I credited the extra hour of light. A soil test finally told the truth: the south bed’s pH was 6.4, while the west bed hovered around 5.8. The west-bed plants were sitting in sun they couldn’t fully use.

    This is the part most garden advice skips. We talk about hours of light as if they exist in a vacuum. I’d argue that healthy, well-structured soil actually makes the light you have go further. Roots move easily through loose, organically rich earth, taking up water and nutrients efficiently, which lets the plant capitalize on every photon that strikes its leaves. Compacted or depleted soil, by contrast, leaves a plant stressed and photosynthesizing below its potential, no matter how golden the bed looks at noon. Mulching garden beds in autumn helps maintain that structure season after season, something I write about in more detail in my fall garden cleanup checklist.

    The Impact of Mulch on Sunlight and Moisture

    I learned the mulch lesson the hard way one July, when my tomato bed baked into a cracked clay pan despite a full day’s sun overhead. The leaves curled, the fruit stalled, and I realized that sunlight alone doesn’t grow vegetables. What the roots experience matters just as much. A 2 to 3 inch layer of organic mulch conserves soil moisture and suppresses weeds (RHS), and that blanket of shredded leaves or straw does something subtler, too: it moderates the soil surface temperature so the sun beating down above doesn’t translate into desiccation below.

    Mulch depth also shapes how much light actually reaches the soil, and by extension, the shallow roots and germinating seeds that live in that top inch. Too thin, and you lose the cooling, moisture-holding effect. Too thick, and you’ve created a dark, cold layer that seeds can’t push through. I aim for that two-to-three-inch sweet spot, pulling the mulch back an inch or two around seedlings so they don’t sit in damp contact with decaying material. In my autumn beds, I follow the same principle, more on that in my guide to mulching garden beds in autumn. The right mulch at the right depth is as much about light management as it is about winter protection.

    Specific Vegetable Sunlight Needs

    After thirty years of trialing vegetables in the same Hudson Valley plot, I’ve stopped thinking in categories like “full sun” and started thinking in plant personalities. Tomatoes are the sun hogs of my garden. Those big, leafy indeterminate vines want heat and light from dawn until mid-afternoon at minimum. The Old Farmer’s Almanac confirms what my ‘San Marzano’ and ‘Brandywine’ plants demonstrate every July: tomatoes need at least 6 to 8 hours of direct sunlight per day to set fruit well (Almanac). Give them less and you’ll get foliage, maybe a few small fruit, and a lot of frustration.

    Peppers, eggplants, squash, and cucumbers fall into the same demanding camp. Six hours is the floor; eight is better. Root crops like carrots and beets tolerate a bit more shade, producing respectably with five to six hours. Leafy greens are the forgiving ones. Lettuce, spinach, and arugula actually welcome afternoon shade once June heats up, which is why I tuck them along the north edge of my tomato beds. Two plant families, one footprint, and the taller plants cast exactly the dappled shadow the greens want.

    Assessing sunlight honestly means spending a weekend watching your yard. I sketch a simple map on a Saturday morning, note where shade falls at 9, noon, and 3, and repeat the exercise in late June, because a site that looks sun-drenched in April may be swallowed by oak canopy once those trees leaf out. A sun calculator or even a phone timelapse works too, though I still trust my own hourly walk-arounds more than any gadget. Knowing what your particular patch actually delivers is where every productive season starts (cindyheathwrites.com). For gardeners who find their space falls short, I’ve written about overwintering herbs indoors as one way to keep productive when outdoor light simply isn’t enough.

    Adjusting for Seasonal Changes

    The sun I count on in July is not the same sun that finds my garden in March, or in October. By midsummer, the arc climbs high and lingers, stretching what was once a six-hour exposure into eight or more. Come autumn, that same bed slips back into partial shade as the sun drops lower and the oak to the south casts its long shadow across the lettuce rows.

    I have learned to plan around this shifting angle. Cool-season crops like peas, spinach, and mâche go in early, when the canopy is bare and light reaches the soil directly. A 2 to 3 inch layer of organic mulch conserves soil moisture and suppresses weeds (Royal Horticultural Society), which matters most when summer heat bakes the surface. I lay it thicker as the season warms, thinner where spring soil is still cold and slow to wake.

    Most vegetables grow best in soil with a pH between 6.0 and 7.0 (Michigan State University Extension), and I test in fall so amendments settle over winter, giving me a clean runway when planting shifts the following spring. I also nudge my late sowings into the sunniest pockets, saving the shadier corners for the leafy greens that tolerate, and even welcome, the respite. For deeper guidance on tucking beds in for winter, see mulching garden beds in autumn: how much and which mulch.

    Conclusion: Takeaways for Successful Gardening

    After thirty-odd years of pushing seed into soil, I’ve come to think of sunlight as a conversation rather than a commandment. The charts say “full sun” and we obey. But the garden itself tells a subtler story. Light never acts alone. It works in concert with the ground beneath it, and the choices we make about that ground shape how much sun a plant can actually use. Soil that’s too acidic or too alkaline locks up nutrients regardless of how bright the afternoon blaze. Most vegetables grow best in soil with a pH between 6.0 and 7.0, slightly acidic to neutral (https://www.canr.msu.edu/news/soil_ph_and_its_importance_in_the_garden), and a tomato in 6.0 soil will outperform one sitting in 5.0 with twice the light. Then there’s mulch, that quiet moderator. A 2 to 3 inch layer of organic mulch conserves soil moisture and suppresses weeds without smothering plant roots (https://www.rhs.org.uk/soil-composts-mulches/mulch), keeping roots cool enough to keep feeding the top growth that’s busy photosynthesizing. If you’re mulching garden beds in autumn, you’re already halfway there.

    So here’s my encouragement: stop reading charts for a weekend and go watch your yard. Track where the shadow falls at nine, at noon, at three. Move a pot of basil from the south bed to the east wall and taste the difference in July. Every garden is its own experiment. Run yours.

    Frequently Asked Questions

    How many hours of direct sunlight do most vegetable gardens need, and what does “full sun” vs. “partial sun/shade” actually mean?

    “Full sun” means six or more hours of direct light daily; “partial sun” lands around three to six. Most fruiting vegetables want that full-sun benchmark, though leafy and root crops forgive less. In my garden, I’ve learned that “full sun” is a flexible phrase. Eight uninterrupted hours is the real ideal.

    Which vegetables truly require full sun and which ones can still produce well in partial shade or lower light (3–6 hours)?

    Tomatoes need at least 6 to 8 hours of direct sunlight per day to set fruit well (Almanac). Peppers, squash, and cucumbers share that hunger. But leafy greens like spinach, lettuce, and Swiss chard, along with root crops like beets and carrots, tolerate three to six hours, often producing smaller but tender harvests in partial shade.

    Can I successfully grow a vegetable garden if my yard gets less than 6 hours of sun, and how will yield and plant size be affected?

    Yes, with realistic expectations.

    Sources

  • preparing vegetable garden soil for spring planting

    preparing vegetable garden soil for spring planting

    Understanding Soil Health

    Understanding Soil Health — preparing vegetable garden soil for spring planting

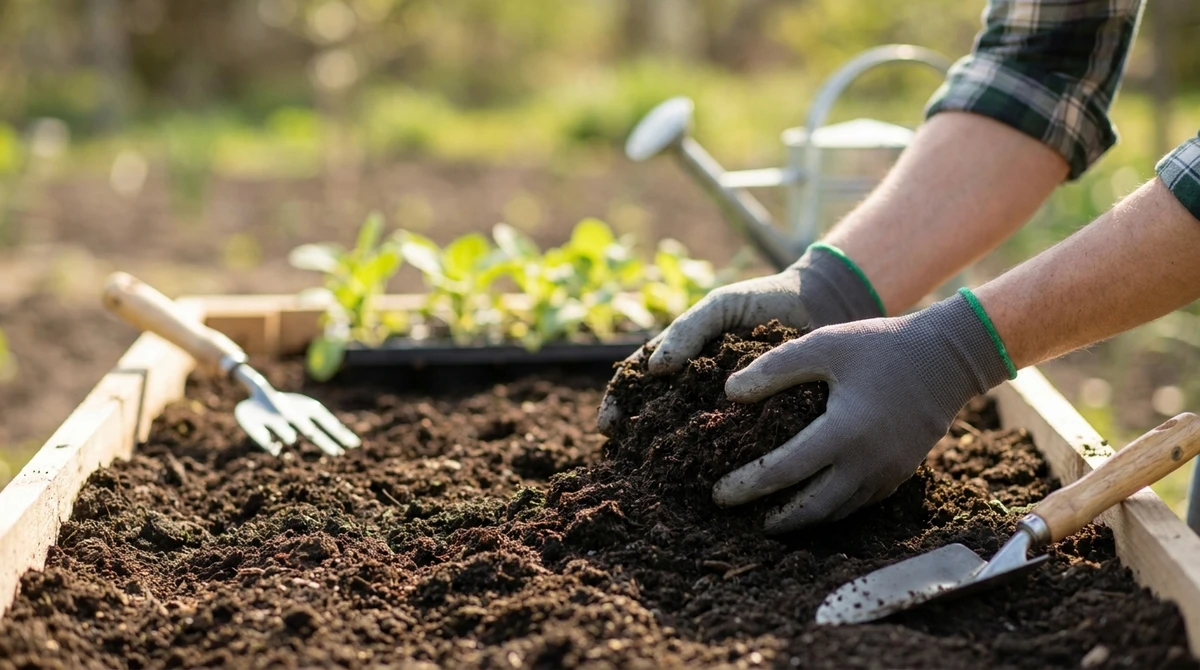
    Preparing vegetable garden soil for spring planting begins with testing pH, adding compost or aged manure, loosening compacted beds, and applying mulch. Healthy soil with balanced nutrients and good drainage gives vegetable seeds and transplants the foundation they need to root deeply and grow vigorously through the season.

    I’ve been gardening long enough to know that soil is not dirt. It’s a living system. Soil health means the whole underground community: bacteria, fungi, earthworms, mineral particles, and organic matter all working together in a relationship I can observe but never fully control. When that system functions, my vegetable plants find what they need without constant intervention from me.

    Most vegetables grow best in soil with a pH between 6.0 and 7.0, slightly acidic to neutral, as Michigan State University Extension notes. That range makes nutrients available to roots rather than locking them up chemically. I test my beds every few years with a simple kit, and the results have saved me from guessing wrong with lime or sulfur more than once.

    A thin layer of mulch matters too. A 2 to 3 inch layer of organic mulch conserves soil moisture and suppresses weeds without smothering plant roots, according to the Royal Horticultural Society. I’ve written about mulching garden beds in autumn before, and that fall habit pays off by spring. The soil underneath stays workable, biologically active, and ready to plant.

    Testing Your Soil pH

    Preparing vegetable garden soil for spring planting starts with a soil test. pH determines whether nutrients reach your crops or stay locked away. Most vegetables grow best in soil with a pH between 6.0 and 7.0, slightly acidic to neutral, according to Michigan State University Extension. Outside that range, even fertile soil feeds poorly.

    I learned this the hard way my third season, when my tomatoes stalled despite generous compost. A $15 home test kit showed pH 5.3, too acidic for calcium uptake. The fix was pelletized lime, but I’d wasted a whole harvest cycle guessing.

    You have two paths. A university extension lab test ($20 to $40) gives precise pH plus nutrient levels and amendment recommendations tailored to your soil. For a quick check, DIY probe kits from any garden center give a ballpark reading. Less precise, but enough to catch major imbalances before planting.

    Test in early spring once soil has thawed but before amendments go in. Take six to eight samples from across the bed, mix them in a clean bucket, and submit a cup of that blend. This avoids the trap of testing one spot that doesn’t represent the whole bed.

    If pH runs low, lime raises it, but slowly, over months. That’s why I test in March, not May. And once you’ve adjusted, a 2 to 3 inch layer of organic mulch helps buffer the soil through the season.

    Amending Your Soil

    Preparing vegetable garden soil for spring planting begins with a soil test, then adding organic matter like compost to correct pH and nutrient deficiencies before planting. Most vegetables grow best in soil with a pH between 6.0 and 7.0, slightly acidic to neutral (Michigan State University). Amend accordingly, mulch, and plant.

    I have learned, over thirty-some years of digging, that the soil test is the one step gardeners skip at their peril. You cannot guess your way to fertility. The lab report tells you what your ground actually lacks, not what the seed catalog assumes it needs.

    If pH runs too low, agricultural limestone raises it; too high, and sulfur brings it down. I spread amendments in late winter, when the frost has just left the ground and the soil crumbles in my hand rather than balling up into a muddy fistful.

    Then comes the part I love: the organic matter. Every spring I lay a generous layer of finished compost over the beds, an inch or two, forked in lightly, never roto-tilled to dust. A 2 to 3 inch layer of organic mulch conserves soil moisture and suppresses weeds without smothering plant roots (RHS). I have come to prefer mulching garden beds in autumn as well, so the ground is already half-dressed by the time planting season arrives.

    Fertilizers? I use them sparingly and only where the test says so. A balanced organic blend for heavy feeders like tomatoes and brassicas, nothing for the legumes, which feed themselves. Too much nitrogen gives you lush leaves and poor fruit, a lesson I relearn every few years when my peppers sulk.

    The Role of Organic Mulch

    Once the soil is tested and amended, mulch is what holds that investment in place. A 2 to 3 inch layer of organic mulch conserves soil moisture and suppresses weeds without smothering plant roots, according to the RHS. I spread composted leaves or fine bark around transplants in May, careful to keep the material back from stems.

    Mulch acts as a barrier that slows evaporation dramatically. Bare soil dries out fast in spring wind. Covered soil stays workable longer, which matters when you are succession-planting lettuce and spinach.

    Weed suppression is the other half. A proper layer blocks the light that weed seeds need. I still get a few interlopers poking through, but they pull easily from damp, covered ground. Without mulch, I would be hoeing every week.

    Organic mulches also feed the soil as they break down, unlike plastic or stone. I treat mulch as a slow amendment. For more on choosing materials and seasonal timing, see my notes on mulching garden beds in autumn: how much and which mulch.

    Preparing the Garden Bed

    Preparing vegetable garden soil for spring planting means testing pH, adding amendments, loosening the bed, and laying mulch. Together, these steps create the loose, fertile ground vegetable seeds need to germinate and thrive.

    Once the soil has been tested and amended, and only once it has dried enough that a handful squeezed in your fist crumbles rather than forms a slick mud ball, it is time to work the bed physically. I learned this the hard way one wet April, when I walked onto my clay patch too early and spent the rest of the season undoing the compaction I had caused with my own boots. Patience is everything here. Most vegetables grow best in soil with a pH between 6.0 and 7.0, slightly acidic to neutral (MSU Extension), so if your test results fell outside that range, the amendments from the previous step should already be incorporated and beginning to do their work.

    Tilling does not need to be aggressive. I use a garden fork to loosen the top eight to ten inches, working in sections rather than striding across the bed and compressing what I just opened. A broadfork is gentler still. It lifts and aerates without inverting the soil layers, preserving the delicate structure that earthworms and fungi have spent the winter building. If you must use a rototiller, go shallow. Repeated deep tilling shatters soil aggregates and, over time, creates a hardpan layer just below the tine depth that roots cannot penetrate.

    After loosening, I rake the surface level and mark out planting rows with a taut string and stakes. Row spacing depends on the crop. Leaf lettuce can go as close as six inches apart, while tomatoes and bush beans want eighteen to twenty-four. I draw shallow furrows with the corner of my hoe, just deep enough to guide seed placement and mark where water should collect. A 2 to 3 inch layer of organic mulch conserves soil moisture and suppresses weeds without smothering plant roots (RHS), so I lay that down the moment seedlings are established, not before, since a thick mulch over freshly sown seed can block germination entirely. For more detail on seasonal mulching choices, see mulching garden beds in autumn: how much and which mulch, since what you do in fall directly shapes how workable the bed is now.

    Choosing the Right Vegetables

    Preparing vegetable garden soil for spring planting means testing pH, adding organic matter and amendments, loosening the bed, and matching crops to your sunlight and drainage.

    Once the soil is ready, the question becomes what to put in it. I always walk the site before choosing. Sunlight drives everything. Tomatoes need at least 6 to 8 hours of direct sunlight per day to set fruit well, according to the Old Farmer’s Almanac. I’ve tried stretching that rule in partial shade; the plants grew lush but set almost no fruit.

    Leafy greens like lettuce, spinach, and Swiss chard tolerate far less light, sometimes as few as three or four hours. Root crops like carrots and beets fall somewhere in between. Soil matters just as much. Most vegetables grow best in soil with a pH between 6.0 and 7.0, slightly acidic to neutral, per Michigan State University Extension. If your test came back acidic, potatoes are your one crop that actually prefers it, down around 5.0 to 5.5.

    Heavy clay that drains slowly? I’d skip root vegetables and stick with brassicas, which tolerate firmer ground. Sandy, fast-draining beds suit beans and squash, which resent sitting wet. A thick layer of organic mulch keeps moisture steady and feeds the soil biology through the season. Mulching garden beds in autumn pays dividends here.

    Maintaining Soil Health Throughout the Season

    Spring preparation gets the garden planted, but the soil keeps working long after the last seedling goes in. I think of the growing season as a slow conversation. The plants take, and I give back. Most vegetables grow best in soil with a pH between 6.0 and 7.0, slightly acidic to neutral, so I check mine again midseason rather than assuming the spring reading still holds (MSU Extension). Heavy feeding, rainfall, and microbial activity all shift the chemistry week by week.

    I top-dress beds with compost between successive sowings, a thin rake-in, nothing elaborate. I keep a 2 to 3 inch layer of organic mulch on the surface to conserve moisture and suppress weeds without smothering plant roots (RHS). When that mulch breaks down, it feeds the soil. For deeper seasonal context, I follow the same principles outlined in mulching garden beds in autumn: how much and which mulch. Soil health isn’t a one-day project; it’s the whole calendar.

    Conclusion and Key Takeaways

    So that’s the whole business, really. Test the soil, amend to its particular needs, loosen what’s compacted, mulch what’s bare, and choose vegetables that belong in the spot you’ve got. Most vegetables grow best in soil with a pH between 6.0 and 7.0, slightly acidic to neutral, and I have watched gardens underperform for years simply because nobody bothered to check. A 2 to 3 inch layer of organic mulch conserves soil moisture and suppresses weeds without smothering plant roots. That thin blanket is worth more than any fancy bottle of fertilizer. If you have been putting it off, don’t. The soil is waking up out there, and it would rather you showed up with a fork and a soil test kit than with another round of indecision. I have never met a bed that couldn’t be improved, only beds I waited too long to start on. Get your hands in it.

    Frequently Asked Questions

    Gardeners ask me the same handful of questions each spring, so I’ll answer them here in one place rather than scattering replies across a dozen seed catalogs.

    The first is always about timing. I start when the soil is no longer frozen or waterlogged. Grab a handful, squeeze it, and if it crumbles rather than forming a mud ball, it’s ready. Clear winter debris, loosen the top few inches with a fork, and add compost before early crops like peas and spinach go in.

    Then comes the question of what to add. I spread an inch or two of finished compost per bed each spring. Lime only if a soil test indicates the pH has dropped below the ideal vegetable range. Most vegetables grow best in soil with a pH between 6.0 and 7.0, slightly acidic to neutral, per Michigan State University Extension. Never guess on lime.

    People also want to know how to test and read the results. I send samples to a university extension lab every few years, which is far more reliable than home kits. The report tells you pH, nutrient levels, and specific amendment recommendations. Follow what your results say. Every garden is different, and a test removes the guesswork entirely.

    The bed itself matters too.

    Sources

  • sustainable natural-material decor for a small living room

    sustainable natural-material decor for a small living room

    The Importance of Sustainable Decor in Small Spaces

    The Importance of Sustainable Decor in Small Spaces — sustainable natural-material decor for a small living room

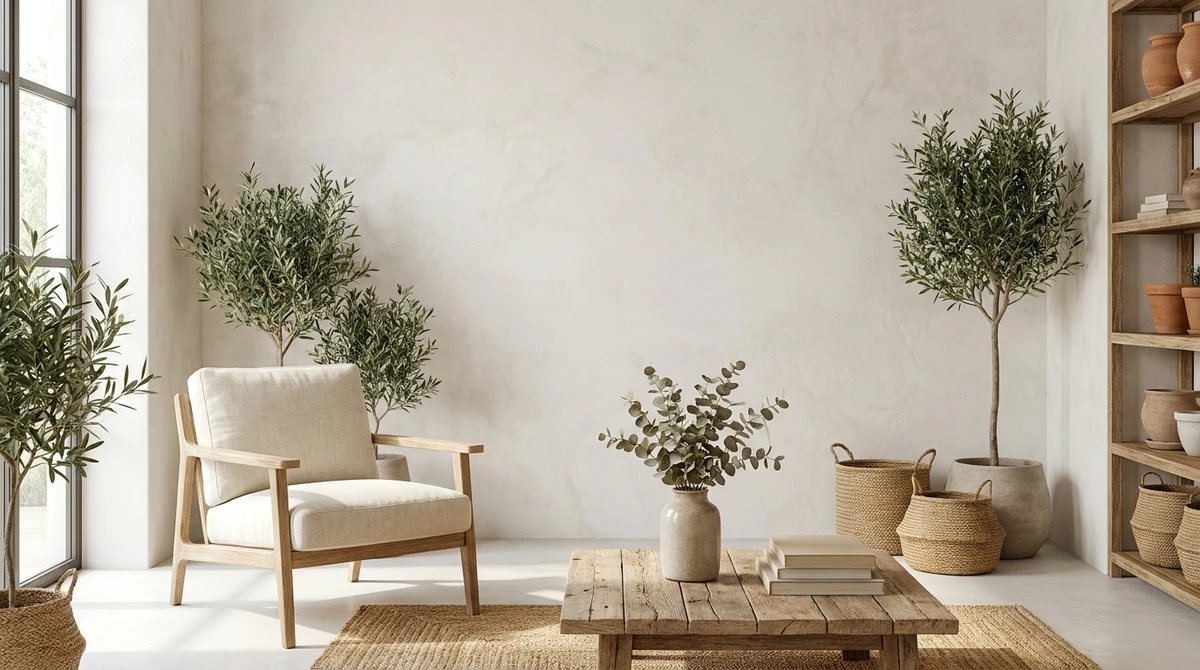
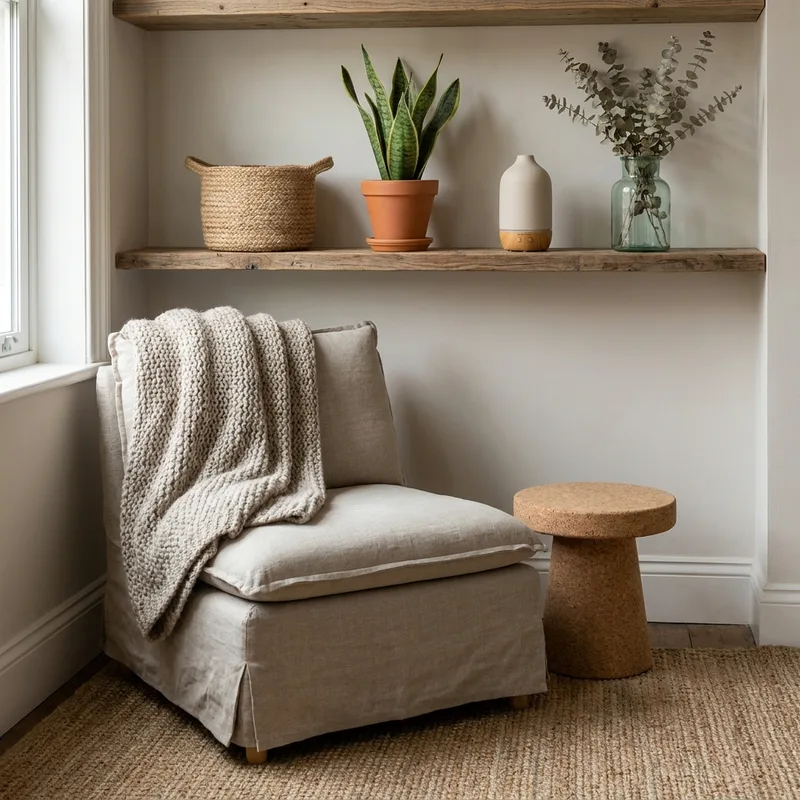
    Sustainable natural-material decor for a small living room means choosing furnishings and textiles made from renewable, non-toxic sources—like unvarnished oak, reclaimed teak, organic linen, and handwoven jute—that age gracefully without off-gassing or cluttering space. I’ve lived with these materials for over a decade, and their quiet presence does more than reduce chemical load—it deepens calm. In a compact room, every piece must earn its place, and natural materials do that by breathing with the space, not fighting it. A low-slung bench of reclaimed walnut, its grain still whispering of forest wind, holds more presence than three synthetic ottomans. Linen curtains, washed soft by rain and time, filter afternoon light like a meadow at dusk. I’ve watched how a single jute rug, worn thin in places, becomes more beautiful with use—its fibers holding the memory of bare feet, of quiet mornings. Unlike mass-produced synthetics, these things don’t need replacing; they invite care. And in a small room, where every square inch counts, that durability isn’t just practical—it’s poetic. For more on how to select materials that last, see mulching garden beds in autumn: how much and which mulch, where the same principle applies: less is more, and nature knows best.

    Choosing Natural Materials: A Guide

    I’ve spent decades choosing materials not just for their look, but for their story—how they were grown, harvested, and shaped by hands that knew when to wait and when to act. In my own small living room, the oak side table came from a fallen tree in a neighbor’s yard, milled locally; its grain still carries the memory of summer storms. Wood, when reclaimed or FSC-certified, doesn’t just hold weight—it holds time. Stone, too, has quiet dignity: a slab of local limestone from a quarry that still uses hand tools, its surface worn smooth by centuries of rain and frost, now rests beneath my favorite chair. It doesn’t need polish; it only asks for patience. Textiles are trickier. Linen from flax grown in Belgium, woven without synthetic dyes, breathes like the leaves of Linum usitatissimum in July. Wool from sheep raised on pasture, not feedlots, retains warmth without synthetic insulation. I’ve learned to touch before I buy: if it feels brittle, it’s been overprocessed. If it smells faintly of earth, it’s likely honest. There’s no certification that replaces the quiet assurance of knowing where something came from—just as there’s no mulch depth that replaces the intuition of a gardener who’s felt the soil beneath their nails. mulching garden beds in autumn: how much and which mulch taught me that less is often more—and so it is with decor. A single piece of honest material, placed with care, does more than a room full of noise.

    Maximizing Space with Sustainable Decor

    I’ve spent decades rearranging small spaces—not just in gardens, but in city apartments where every inch counts. In my own living room, a reclaimed oak bench from a shuttered Vermont schoolhouse doubles as seating and a side table, its surface worn smooth by decades of hands and rain. It holds my teapot, a basket of dried lavender from last summer, and a stack of dog-eared seed catalogs. That’s the rhythm: function first, then beauty. When I installed vertical shelves made of sustainably harvested bamboo—salvaged from a demolished warehouse in Portland—I didn’t just gain storage; I freed up floor space for the philodendron and the geraniums I keep near the window, their leaves brushing the glass like shy guests. The shelves, untreated and oiled with linseed, breathe with the seasons, darkening slightly in winter’s dim light. I’ve seen too many “sustainable” pieces that are just veneer over particleboard; real durability comes from material honesty. Choose solid wood, jute-woven baskets, or wool rugs certified by the Global Organic Textile Standard. They outlive trends—not because they’re fashionable, but because they’re made to be held, not discarded. And if you’re wondering where to begin? Start with what you already own. A ladder turned bookshelf, a crate turned side table—these are quiet acts of renewal. mulching garden beds in autumn: how much and which mulch taught me that layering matters—same in the home. A 2-inch shelf of woven rattan beneath the sofa? It hides the vacuum and the dog’s chew toy, and still lets the floor breathe.

    Incorporating Plants for a Natural Touch

    I’ve spent decades watching how a single fiddle-leaf fig, placed just so beside a reclaimed oak side table, can turn a corner into a quiet sanctuary—its leathery leaves catching the afternoon light like stained glass. In a small living room, plants aren’t just decor; they’re the quiet pulse of the space, softening edges, humidifying dry air, and yes—filtering toxins, as NASA’s Clean Air Study first noted with Chlorophytum comosum and Epipremnum aureum. I’ve seen them thrive in terracotta pots on a windowsill, their roots snug but not crowded, their needs simple: bright, indirect light, and a drink only when the top inch of soil feels like a cool stone. For narrow spaces, I favor Sansevieria trifasciata—snake plant—whose upright blades demand little and forgive much, even when I forget to water for weeks. A trailing Scindapsus pictus in a woven jute hanger spills green like a liquid curtain, no shelf required. I don’t buy plastic planters; I repurpose ceramic bowls from my kitchen, or thrifted stoneware, glazed in earth tones. And I mulch the soil surface—not for the garden bed, but for the pot—with a thin, 1-inch layer of shredded coconut coir, just enough to slow evaporation without choking the roots. It’s a habit I learned from my grandmother, who kept a single Hedera helix in her hallway for forty years. She never spoke of air quality. She just said, “It feels alive.” And it did.

    Creating a Cohesive Look with Color and Texture

    I’ve spent years arranging mossy stones and woven baskets beside my garden shed, learning how texture and tone whisper more than any label ever could. In a small living room, where every inch breathes with intention, I reach for linen that softens with time—like the way Lavandula angustifolia petals fade in late summer—and pair it with undyed wool from a shepherd in the Pyrenees, its slight irregularities holding the memory of wind. The palette? Not trendy gray, but the quiet hum of clay, oat, and the pale green of Fagus sylvatica leaves in early spring—colors that don’t shout but settle in, like mulch around a rootball. Mulching garden beds in autumn: how much and which mulch taught me that too much of anything smothers; a 2-inch layer of jute rug underfoot, a single teak side table, a basket of dried Artemisia ludoviciana—these are the anchors, not the clutter. Texture is the quiet pulse: the grit of raw ceramic beside the silkiness of ramie curtains, the way a handwoven cotton throw catches the afternoon light differently than a synthetic one ever could. I don’t choose finishes to match—I choose them to converse. And when the light slants low in November, it’s not the brand that matters, but the silence between the materials—the space where calm lives.

    Real-Life Examples of Sustainable Decor

    I still remember the first time I sat in Lena’s living room—the one she carved out of a Brooklyn studio with reclaimed oak shelving, a jute rug woven in Oaxaca, and linen curtains that caught the afternoon light like a gauzy veil. No new furniture. No plastic. Just things that had lived before, and would live again. She told me she bought the armchair from a neighbor who’d inherited it from his grandmother—upholstered in wool that had faded to the color of dried lavender, the frame still solid, the springs singing just enough to remind you it was hand-built. That chair, she said, was her daily meditation.

    Her coffee table? A slab of salvaged black walnut, sanded by hand, finished with beeswax—no varnish, no toxins. It holds a ceramic bowl she made in a clay workshop last fall, filled with pinecones from the park, and a single sprig of rosemary she grows in a terracotta pot on the windowsill. It smells like winter, even in June.

    I’ve seen too many “sustainable” living rooms that feel like a catalog—perfectly arranged, sterile. Lena’s isn’t. It’s lived-in. The wool blanket on the sofa? Hand-knit by her mother from ethically sourced Merino, dyed with onion skins. The shelves? Built from pallet wood she stripped and planed herself, after learning how to avoid hidden nails.

    I keep thinking about how much carbon we save—not by buying “eco” labels, but by choosing to love what’s already here. And how, in a small space, every object must earn its place. Not by trend, but by memory, by craft, by care.

    Mulching garden beds in autumn: how much and which mulch taught me patience—layering, not dumping. The same applies here. Slow decor, like slow soil, takes time to settle into its truest form.

    Takeaways: Your Path to a Sustainable Living Room

    I’ve spent years watching how light falls on a wool rug woven in Nepal, how the grain of reclaimed oak holds the memory of its former life, how a potted Ficus lyrata in a hand-thrown terracotta pot softens the edge of a bamboo shelf. Sustainable decor isn’t about perfection—it’s about patience, and presence. In a small living room, every object carries weight, so choosing materials that breathe—linen, jute, untreated wood, recycled glass—feels less like a choice and more like a relief. I’ve seen too many spaces choked with synthetic fibers that trap heat and off-gas; I’ve sat on sofas that cracked after two winters. But a chair upholstered in organic cotton, its frame sourced from a local mill that mills only sustainably harvested maple? That’s the kind of thing that settles into your bones. You don’t need to overhaul everything at once. Start with one piece—a throw from a cooperative in Oaxaca, a side table made from salvaged driftwood. Let it live with you. Notice how it changes with the seasons, how it gathers dust like pollen on a leaf. When you’re ready, consider how your choices ripple: the water saved by avoiding synthetic dyes, the carbon not released by shipping plastic from halfway around the world. You’re not just decorating. You’re tending. And if you’ve ever mulched a bed with two inches of shredded bark—just enough to hold moisture without smothering roots—you already know this rhythm. mulching garden beds in autumn: how much and which mulch. Start small. Stay curious. Let your space grow with you.

    Frequently Asked Questions

    How can I decorate a small living room using sustainable, natural materials without making the space feel cluttered?

    I’ve learned that less is never too little—especially when the materials have character. A single walnut side table, a handwoven jute rug, and one ceramic vase with dried lavender from my garden speak louder than a dozen mass-produced items. Let each piece breathe. Avoid stacking; instead, anchor with one or two intentional objects. Think of it like pruning a shrub: remove what doesn’t serve the form, and the rest shines. mulching garden beds in autumn: how much and which mulch taught me that even in soil, too much cover smothers—same here.

    What specific eco-friendly natural materials (e.g., wood, bamboo, linen, jute, wool) are best suited for furniture, textiles, and accessories in a small living room?

    I reach for FSC-certified walnut for low-profile shelving—it’s dense, lasts generations, and ages with quiet dignity. Linen curtains, unbleached and undyed, soften light without synthetic glare. Jute rugs, woven without synthetic backings, anchor the floor with texture, while wool throws from small-scale shepherds in the Pyrenees hold warmth without chemical treatments. These aren’t trends—they’re materials that remember their origins. I’ve sat on wool cushions for a decade; they still look like they’ve been loved, not laundered into oblivion.

    How can I maximize light, storage, and seating in a small living room while maintaining a minimalist, natural-material aesthetic?

    I keep windows bare or draped in unbleached linen—no blackout layers, no sheers that yellow. Light moves like water here.

  • overwintering herbs indoors

    overwintering herbs indoors

    Understanding the Needs of Herbs

    Understanding the Needs of Herbs — overwintering herbs indoors

    Overwintering herbs indoors isn’t about replicating summer—it’s about listening to what they’ve forgotten how to say. Rosemary, thyme, and sage remember the cool, dry air of Mediterranean hillsides; they thrive where the light is sharp and the soil stays stubbornly dry. Basil and cilantro? They’re southerners caught in a northern winter, and without supplemental light and steady warmth, they fade fast. I’ve buried more than one potted oregano under its own wet roots, convinced it needed more water. I won’t do it again.

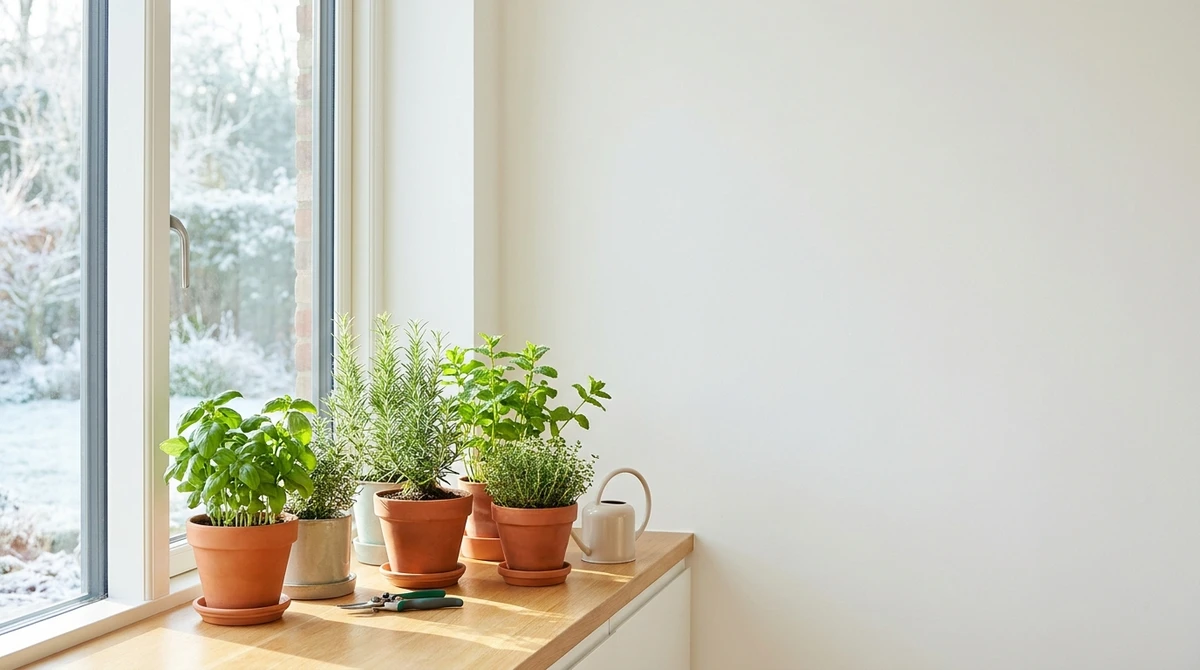
    Mint, though tough outdoors, turns into a leggy ghost indoors unless pinched weekly and given at least six hours of direct sun—something even a south-facing window struggles to deliver in December. The Chicago Botanic Garden says most herbs need four to six hours of sun, or about 14 hours of supplemental light, daily to stay compact, aromatic, alive. Without it, they stretch, weaken, and eventually go quiet. My rosemary sits near a cool east window—55°F, just enough to slow it without stopping it. I water only when the top inch of soil feels like a crumbled pencil eraser.

    Herbs aren’t just transplanted garden plants. They’re refugees from seasonal rhythms, each with its own winter dialect. Thyme tolerates dry air like a desert nomad. Chives crave cool nights and consistent moisture—50 to 60°F is their sweet spot. Basil, brought in too late and too warm, turns yellow within days, a silent protest against humidity below 40%. It’s not about keeping them alive—it’s about keeping them useful. Soil matters, yes, but airflow matters more. A radiating room feels like spring to us. To them, it’s a trap. A healthy herb in January should still smell like itself. If it doesn’t, the light is wrong—or the roots are drowning. fall garden cleanup checklist helps you prepare them for the move—but true success begins when you learn to hear their quiet language.

    Choosing the Right Location Indoors

    Sunlight isn’t a suggestion. It’s the currency of survival. Rosemary, thyme, and sage need at least six hours of direct light—just like tomatoes do. Almanac I’ve watched too many pots slump on north-facing sills, leaves pale, stems thinning like they’re whispering for help. A south-facing window can still give that intensity in December—if you rotate the pots every few days. Left alone, they lean like sunflowers on a tilt.

    Mint, parsley, and chives are more forgiving. They’ll tolerate less, but they’ll thank you with fuller growth if you tuck them beside the rosemary. I keep mine on a shelf beneath a fluorescent fixture in the kitchen—simple, reliable, untouched by cloud cover. Humidity is the quiet crisis. Heated rooms in December are deserts. Cilantro wilts in days. I set trays of pebbles under their pots, filling them with water just below the stones. The slow evaporation lifts the air like a whispered breath of spring.

    And never ignore the drama of a drafty door. One night, a single plant near it curled its leaves inward, roots chilled. Location isn’t just about light. It’s about reading the room—the rhythm, the sighs, the unspoken needs. If you’ve just finished your fall garden cleanup checklist, this is where the real work begins—not in the soil, but in the space you choose to shelter it.

    Watering and Humidity Management

    I’ve lost more herbs to kindness than to frost. Watering because I thought they looked sad. Watering because it was Tuesday. Rosemary, thyme, sage—they don’t crave constant moisture. They beg for dry roots. The rule now? Stick your finger in up to the second knuckle. Only water when it’s dry as parchment. And when you do, give them a slow drink—not a flood.

    Humidity is the quiet crisis. Our homes in December are bone-dry. Basil, lemon balm, even mint wilt like old paper. I keep a shallow tray of pebbles under their pots, water just below the stones. The moisture rises, gentle, without ever touching the soil. On nights the furnace kicks on and the air turns brittle, I mist the leaves lightly before bed—not to wet them, but to remind them of dew. Marjoram thrives this way. Oregano shrugs it off and grows slower, steadier.

    You don’t need a humidifier unless you’re growing a whole windowsill jungle. One pot, one tray, one patient hand—that’s enough. And if you’ve just moved herbs inside from the garden? Don’t rush. Let them adjust. They remember the light. They’ll tell you when they’re ready. fall garden cleanup checklist taught me to trim, inspect, ease them in—not yank them out.

    Common Mistakes to Avoid

    I’ve lost rosemary to overwatering more than to frost. Its silvery needles turn soft, then black, then slip from the pot like wet tissue. The mistake? Assuming less growth means less water. But the soil never dries—not truly. Thyme, oregano, sage—they’re natives of dry, rocky slopes. Soggy roots are their death sentence. I check with my finger: if the top inch is damp, leave it be. Dry to the knuckle? Then a sip. Never a soak.

    Light? A south-facing window isn’t enough if it’s dusty or shaded by evergreens. I’ve seen basil, once vigorous, collapse in a corner where the light was merely “bright”—not direct, not sustained. Grow lights aren’t luxury. After November, they’re nonnegotiable. I hang my LEDs just above the pots, on a timer: 14 hours, no less.

    Pests? I inspect the undersides of leaves every time I water. Aphids cluster where stems meet foliage. Spider mites leave their fine lace on mint. One scale insect on a bay leaf can become a colony before you notice. I spray with diluted neem oil—no chemicals—and isolate any suspect plant immediately. Don’t wait for yellowing. The moment you bring herbs inside, treat them like guests in a quiet, sunlit room—not an afterthought. You wouldn’t leave a friend in a drafty closet with a perpetually full glass of water. Why do it to your thyme? fall garden cleanup checklist taught me to look before I moved them—clean pots, trim deadwood, check for hitchhikers. It’s the same discipline indoors.

    Fertilizing and Soil Care

    Soil isn’t just dirt in a pot. It’s the quiet foundation of survival. Most herbs—sage, oregano, thyme—thrive in slightly acidic to neutral pH, the same range as vegetables: 6.0 to 7.0. CanR MSU I test mine in late fall, before the move indoors. Too alkaline, and nutrients lock up. Too acidic, and roots sulk.

    I rarely fertilize through winter. The plants aren’t growing. They’re holding their breath. A slow-release granular organic fertilizer worked into the soil at transplant time—late September, when the nights first bite—is enough. I avoid liquid feeds. They encourage tender new growth that burns under low light and invites spider mites. If a plant looks pale by January, I wait. I whisper to it. Then wait some more.

    The soil should remain just damp, never soggy, never dust-dry. A light top-dressing of compost in early February, when the days begin to lengthen, often rouses a sleepy basil or chervil—not because it needs feeding, but because it needs the hint of spring. I’ve watched this rhythm too many times to rush it. The soil remembers what the plant forgets. And if you did your fall garden cleanup right—removing debris, aerating, mulching lightly—the potting mix will carry that quiet strength into winter.

    Monitoring and Adjusting Care

    I watch my rosemary like a sentinel. When its needles begin to yellow at the tips, I know: the air is too dry. Not the radiator’s fault, exactly—but the consequence of winter’s siege. Basil drops leaves the moment the soil stays damp past noon. I’ve lost three pots that way, convinced I was being kind. Thyme? Thyme is stoic. It tolerates neglect better than most. But if the light fades even a little, its stems stretch toward the window like beggars.

    I rotate them weekly. South-facing light, even in January, isn’t uniform. I check the soil with my finger—not a gadget, not a thermometer—just my knuckle, sinking an inch deep. Cool and clinging? Wait. Dust-dry and cracking? Water slowly. No more than once a week, unless the pot sits above a radiator. Then, twice.

    I’ve seen mint survive in a mason jar on a north sill. Lemon balm? It withers unless it gets five hours of direct sun. I keep a modest LED strip over my chives now—nothing fancy, just enough to mimic the lengthening days of early spring.

    And I never assume. One year, I moved oregano indoors too early. It sulked for weeks. Only when I left it on the porch, wrapped in burlap, until the first frost kissed it—then brought it in—did it settle. Herbs remember seasons. They don’t just adapt. They grieve, then resume.

    If you’re wondering whether your herbs are thriving, look at the new growth—not the old. A single tender shoot on your sage? That’s your answer. And if you’re not sure what to do next, revisit your fall garden cleanup checklist. Sometimes, the best overwintering begins long before the pot enters the door.

    Conclusion and Key Takeaways

    I’ve watched rosemary struggle in drafty windowsills and thyme surrender to root rot in soggy pots—season after season. Overwintering herbs indoors isn’t about mimicry. It’s about patience. You can’t just bring them in when the first frost bites. You must notice how their growth slows, how their thirst changes, how the light angles differently across the sill each morning.

    Basil won’t survive, no matter how much you coax it. Stick with hardier souls: oregano, sage, chives, even lemon balm if you give it room. I’ve had pots of mint thrive for two winters on a south-facing shelf, its roots creeping through the drainage holes like quiet rebels. Don’t treat them like houseplants. They’re dormant, not dormant-dead.

    Water only when the top inch feels dry—never on a schedule. A humidity tray helps, but not as much as keeping them away from radiators. A single grow light, hung just above the tallest pot, makes more difference than any fertilizer. And when March comes, don’t rush them back outside. Let them acclimate slowly, like you’d ease a child into a cold pool.

    Try one herb you’ve never overwintered—maybe tarragon or cilantro—and watch what happens. The garden doesn’t end with frost. It just changes its voice. For the rest of your winter prep, don’t forget the fall garden cleanup checklist. And if you’re curious about how soil pH affects root health, this guide has kept me grounded for years.

    Frequently Asked Questions

    Which herbs can be successfully overwintered indoors, and which ones are best left outdoors or replaced each year?

    I’ve kept rosemary, thyme, and sage alive for years by the south window—these woody perennials tolerate dry air and low light better than most. Basil, cilantro, and dill? They’re annuals, and I let them go with the frost. Mint survives indoors but runs wild in its pot; I keep it separate. Chives often bounce back, though they thin out. Parsley? A stubborn biennial—I treat it as a one-winter wonder. Don’t waste effort on tender herbs like lemon balm unless you’ve got strong light.

    When should herbs be brought indoors for winter, and how should they be prepared before moving them?

    I wait until nighttime temps dip below 45°F—usually late October here in the Hudson Valley. Before moving them, I inspect for aphids and spider mites, rinse the foliage, and repot into clean containers with fresh potting mix. I cut back leggy growth by a third—this isn’t pruning for shape, but to reduce transplant shock. I’ve seen too many herbs sulk for weeks after being yanked inside too early, their roots still clinging to cold soil.

    What kind of light do indoor overwintered herbs need, and are grow lights necessary?

    A south-facing window is non-negotiable for rosemary and thyme—they’ll stretch and die without six hours of direct sun. I’ve watched them curl toward the glass like sunflowers. If your light is weak, even a simple LED grow strip helps. I use one on a timer from 7 a.m. to 7 p.m. for my windowsill sage. It’s not glamorous, but it’s the difference between a few limp leaves and a winter harvest. Don’t rely on ambient light alone—herbs don’t care about your décor.

    Sources

  • mulching garden beds in autumn: how much and which mulch

    mulching garden beds in autumn: how much and which mulch

    The Importance of Mulching in Autumn

    The Importance of Mulching in Autumn — mulching garden beds in autumn: how much and which mulch

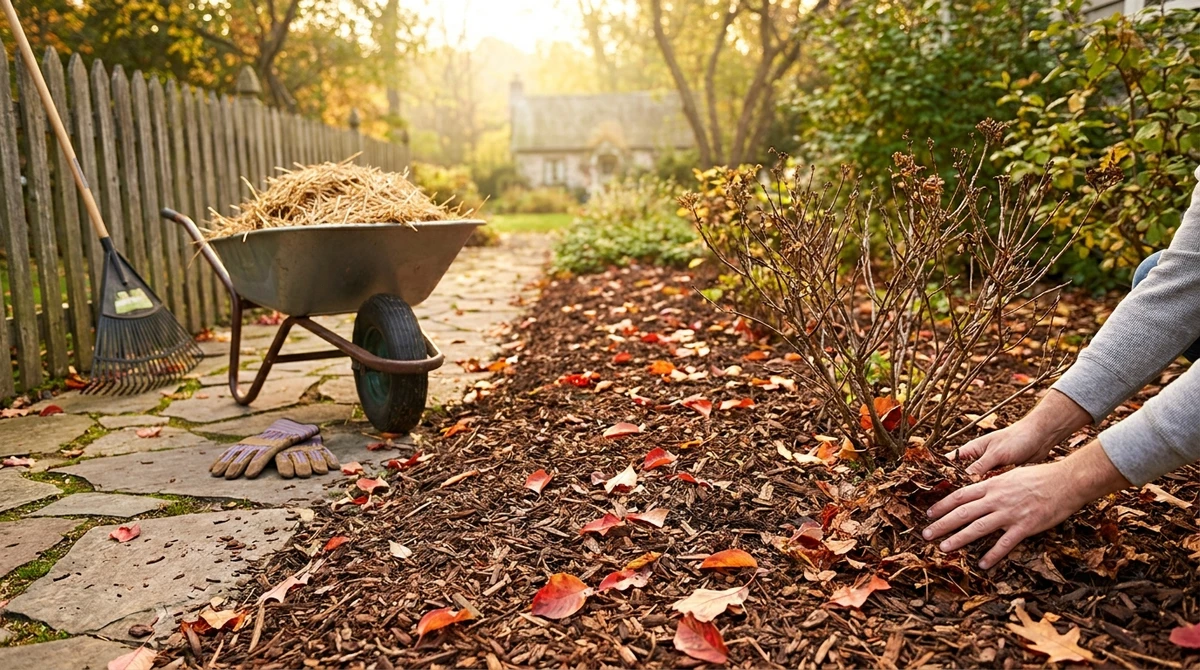
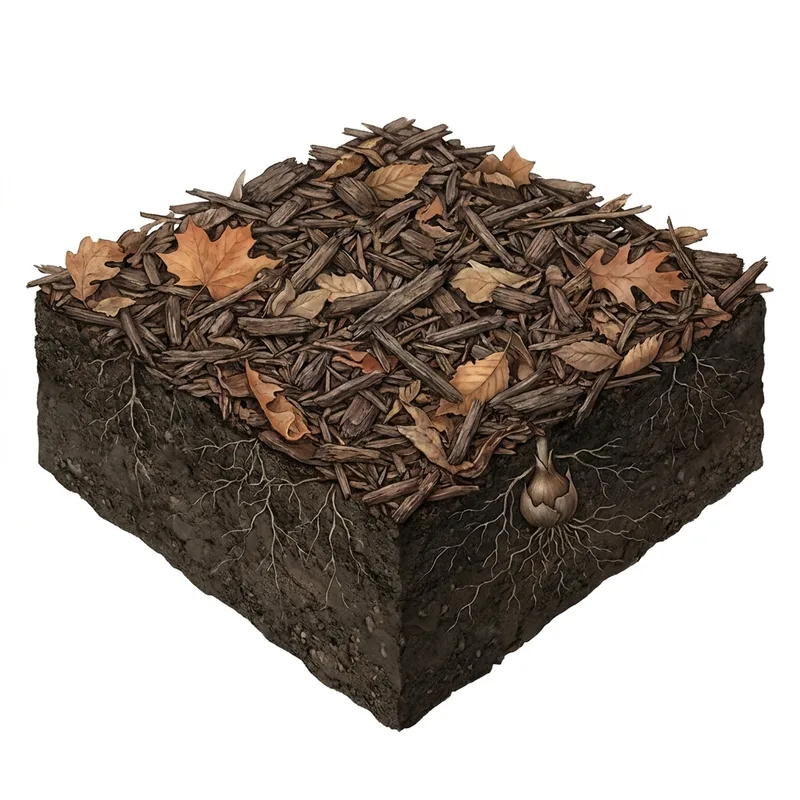
    For mulching garden beds in autumn, apply a 2 to 3 inch layer of organic mulch such as shredded leaves, compost, or bark. This depth conserves soil moisture, suppresses weeds, and insulates plant roots against freezing winter temperatures without smothering them.

    I have learned, over thirty-plus autumns, that the timing matters as much as the material. Wait until the ground has cooled, somewhere around mid-November in my Zone 5b garden, and you avoid inviting rodents to nest against warm crowns. Pile it on too early and you trap heat. Too late and the freeze-thaw cycles have already heaved your newly planted garlic and shallow-rooted asters halfway out of the ground. A proper fall garden cleanup checklist accounts for this sequence.

    The Royal Horticultural Society confirms what my own beds have shown me season after season: a 2 to 3 inch layer of organic mulch conserves soil moisture and suppresses weeds without smothering plant roots (Royal Horticultural Society). That depth is the sweet spot. Less, and you lose the insulating blanket effect. More, and you risk rot, particularly on perennials and woody stems.

    Winter temperature protection is the reason I mulch most intently. The goal is not warmth but stability, holding soil at an even temperature so roots do not break dormancy during a January thaw only to be clobbered by the next cold snap. Shredded oak leaves are my preference for beds. They mat down rather than blowing away.

    Choosing the Right Mulch for Your Garden

    For mulching garden beds in autumn, apply two to three inches of shredded leaves, compost, or bark to perennial beds after frost but before ground freeze. Use straw or evergreen boughs on tender plants, keeping all mulch away from stems and crowns to prevent rot.

    I have spent thirty autumns mulching this hillside garden, and I keep returning to the same materials. Organic mulch is what I use because it feeds the soil as it breaks down. Leaves, compost, bark, straw, each has its place. Inorganic mulch like stone or landscape fabric has its uses, perhaps on a dry path or beneath a foundation planting, but it contributes nothing to soil structure and I avoid it in beds where plants must overwinter.

    Shredded oak and maple leaves are my first choice for perennial borders. They mat down nicely, insulating crowns of asters and sedums without smothering them. Compost goes on the vegetable beds, where spent tomatoes and peppers stood last month. Bark mulch I reserve for woody plantings, around the old rhododendrons and the blueberry patch, because it holds through winter without washing away in spring rains.

    Some plants ask for special treatment. My tender rosemary gets a collar of straw, and the fig tree gets wrapped in burlap stuffed with autumn leaves. Garlic beds get a blanket of straw to prevent heaving through the freeze-thaw cycle. Before you mulch anything, though, work through a fall garden cleanup checklist so you are not trapping diseased foliage or harboring pests beneath that cozy layer.

    Ideal Mulch Depth for Effective Coverage

    Mulching garden beds in autumn: how much and which mulch? Apply a 2 to 3 inch layer of organic mulch, shredded leaves, compost, or bark, over beds after cleanup, keeping it back from stems and crowns. That depth conserves moisture, suppresses weeds, and insulates roots through winter.

    I learned the hard way one November that more is not better. I’d piled a foot of shredded oak leaves over a patch of newly planted hellebores, thinking I was tucking them in for winter. Come March, three crowns had rotted clean through. A 2 to 3 inch layer of organic mulch conserves soil moisture and suppresses weeds without smothering plant roots, as the Royal Horticultural Society advises, and that is the range I return to every fall now, no matter how generous I feel.

    The depth matters because of what mulch actually does underground. Two inches still lets early-spring sun warm the soil so my garlic can get going. Three inches holds enough moisture to carry the bed through dry October winds. Anything thicker turns into a wet mat that locks in cold and invites the very rot I brought on those hellebores. Less than two, and the weed seeds I missed during my fall garden cleanup checklist simply laugh and germinate anyway.

    Preparing Your Garden Beds for Mulching

    Before a single wheelbarrow of mulch touches the soil, the beds need a thorough clearing. Fallen leaves, twiggy debris, and the last of the frost-killed annuals pulled and composted, anything diseased set aside for the trash rather than the heap. A fall garden cleanup checklist keeps me honest about what stays and goes. I work on my knees, feeling for crowns of emerging epimedium and hellebore, careful not to trample them.

    This is also the moment for soil amendment. A thin layer of compost, perhaps an inch, scratched in around perennials feeds the soil food web through the cold months. I avoid heavy digging now. Autumn is for laying down, not turning up.

    Then, water. Even in late October, I run the hose over beds that have gone dry beneath their leaf litter. Mulch laid over parched soil locks in drought. Laid over moist soil, it conserves what’s there. I soak the beds until the water penetrates an inch or two, then let the surface dry before spreading mulch. Damp, never sodden.

    Applying Mulch: Techniques and Tips

    I learned the hard way, years ago, that mulching is not a dumping exercise. You cannot simply pitch a wheelbarrow load onto the bed and hope the rake will sort it out. Even distribution starts with smaller, deliberate handfuls, or with the fork held low, scattering in a wide arc as you step backward off the bed. Work from the edges inward. This keeps the material moving toward the center, where depth matters most for root protection, rather than piling it at the perimeter where it will simply slide into the lawn.

    The single most common mistake I see, and I have made it myself with overzealous enthusiasm in October, is banking mulch against the trunks of shrubs and the crowns of perennials. Bark mulch or shredded leaves piled against woody stems trap moisture, inviting rot and giving voles hidden runways to gnaw at bark all winter. Keep mulch pulled back a few inches from any woody stem, and leave the crowns of tender perennials, like my Asarum europaeum, barely covered or simply blanketed lightly so they can breathe. A finished bed should look like a freshly made doughnut, not a volcano.

    Once laid, autumn mulch largely tends itself through the frozen months, but I always walk the beds after the first hard thaws of late winter. Wind can shift lightweight straw. Heavy rain can compact fluffy leaf litter into a mat that suffocates emerging shoots. A quick fluff with a fork or a top-up in bare spots keeps the layer working as insulation and weed suppression. Tying this work into your broader fall garden cleanup checklist ensures you do not forget the beds that need attention most before the ground freezes solid.

    Monitoring and Maintaining Your Mulch

    I check my mulch the way I check the pantry, by looking, touching, and trusting what I find rather than following a rigid schedule. A good autumn mulch layer should still be holding its shape come February, but by March I’m out there kneeling in the cold, pressing back the shredded leaves and pine bark to see what remains. When the layer has thinned to under an inch, when I can see bare soil peeking through, or the mulch has gone gray and crumbly and lost its loft, I know it’s time to top things up. Woody mulches like bark nuggets break down slowly, holding their structure through two full seasons. Leaf mold and compost go faster, often needing a refresh by early spring.

    Seasonal timing matters more than most gardeners realize. I never replenish mulch while the ground is still warm and actively biodegrading in late autumn, because piling fresh material on top of a working soil ecosystem can smother it. Instead, I wait for the soil to cool and settle into its winter dormancy, then add just enough to maintain that two-to-three-inch depth I aimed for back in October. A light fluff with a fork, not a full turn, revives compacted mulch that’s matted from winter rain and snow, restoring its insulating air pockets. And if you’re working through your fall garden cleanup checklist and notice the mulch has washed into piles against trunks or crowns, pull it back gently. That contact invites rot and gives rodents a winter hiding spot.

    Takeaways: The Key to Successful Autumn Mulching

    Mulching garden beds in autumn comes down to two decisions: which material and how deep. For most ornamental beds, two to three inches of shredded bark or leaf mold does the work. Vegetable plots benefit more from straw or compost at the same depth. I keep wood chips for paths, not beds. Before you lay anything down, work through a fall garden cleanup checklist so you’re not trapping diseased leaves or slug eggs under a cozy winter blanket.

    The depth question matters more than gardeners realize. Too little and frost heave will lift your crowns. Too much and you’ve built a damp mat that invites rot. I aim for that two-to-three-inch window and pull every mulch back from stems, trunks, and crowns. No volcanoes around the base of anything.

    What you get in return is worth the effort. A proper autumn mulch moderates soil temperature swings, holds moisture through dry winter winds, and feeds the soil biology that keeps the whole system running. Come spring, the beds wake up in better shape than they went to sleep.

    Frequently Asked Questions

    How much mulch should I apply to garden beds in autumn?

    I aim for a two- to three-inch layer on most beds, enough to insulate roots and suppress winter weeds without smothering the soil beneath. On perennial borders, I lean toward the lighter end. Heavy clay soils get less. Sandy plots can take a bit more. For a thorough prep routine, see the fall garden cleanup checklist.

    Which types of mulch are best for autumn mulching: leaves, wood chips, bark, straw, compost, or other materials?

    Shredded leaves are my go-to. Free, locally available, and beloved by soil organisms. On ornamental beds, fine bark holds its texture through snow. Compost feeds while it blankets. Straw suits vegetable plots. I avoid raw wood chips on perennial crowns. They mat and shed water.

    Should mulch be applied before or after the first frost, and what timing is best for different plants or climates?

    Here in Zone 5, I wait until the ground freezes lightly, usually mid-November, before adding winter mulch. The goal is keeping soil frozen, not warming it. Earlier mulching invites rodents and delays dormancy. Gardeners in mild climates can mulch anytime beds are weeded and cleaned.

    How far should mulch be kept away from stems, trunks, crowns, and perennials to avoid rot or pests?

    I pull mulch back several inches from woody trunks and perennial crowns. What I call the doughnut, not the volcano. Bark piled against a young tree’s trunk invites rot and borers. Crowns of tender perennials like heuchera want a light, airy covering, not a dense pack.

    What benefits does autumn mulching provide, and are there any risks or situations where mulching should be avoided?

    Autumn mulch moderates freeze-thaw cycles that heave young plants, feeds soil biology, and holds moisture. But skip it where voles are active. They’ll tunnel under cozy cover and gnaw bark. Wet, poorly drained spots need less mulch, not more. Piling on soggy beds only compounds rot.

    Sources

  • fall garden cleanup checklist

    fall garden cleanup checklist

    Understanding the Importance of Fall Cleanup

    Understanding the Importance of Fall Cleanup — fall garden cleanup checklist

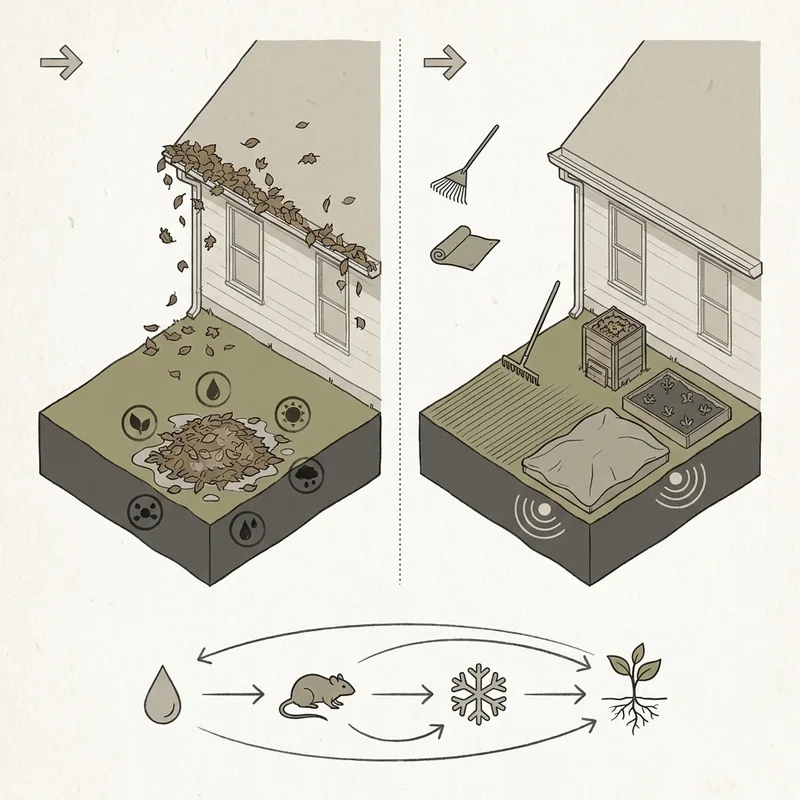
    A thorough fall cleanup covers removing diseased plant debris, cutting back perennials, mulching beds, testing and amending soil, clearing leaves, and winterizing tools and irrigation. These tasks protect soil health and set the stage for vigorous spring growth.

    I learned the hard way, years ago, that skipping fall cleanup is not a kindness to the garden. Left to their own devices, fallen leaves and spent stalks harbor fungal spores and insect eggs that emerge with a vengeance come May. The cleanup itself is less about tidiness than about breaking disease cycles and protecting the soil that everything depends on.

    What you do now directly shapes what the garden can do next April. Clearing away blighted tomato foliage and powdery-mildewed phlox stems removes the inoculum that would otherwise overwinter. A 2 to 3 inch layer of organic mulch conserves soil moisture and suppresses weeds without smothering plant roots, as the Royal Horticultural Society advises. Fall is also the right time to check your vegetable beds’ pH, because most vegetables grow best in soil with a pH between 6.0 and 7.0, slightly acidic to neutral, according to Michigan State University Extension. Lime takes months to work into the soil; applying it now means the adjustment lands in time for planting.

    The connection between autumn effort and spring reward is plain. Soil that is covered, fed, and protected through winter freezes and thaws comes alive faster. Cleanup is not about erasing the garden’s remains but about curating what stays and what goes, so the ground is ready when the light returns.

    Assessing Your Garden’s Needs

    A good cleanup starts with a slow walk through the beds, notebook in hand, to assess which plants need cutting back, which stay standing for wildlife, what soil amendments your beds require, and how to handle leaves and diseased debris before frost.

    Assessing Your Garden’s Needs

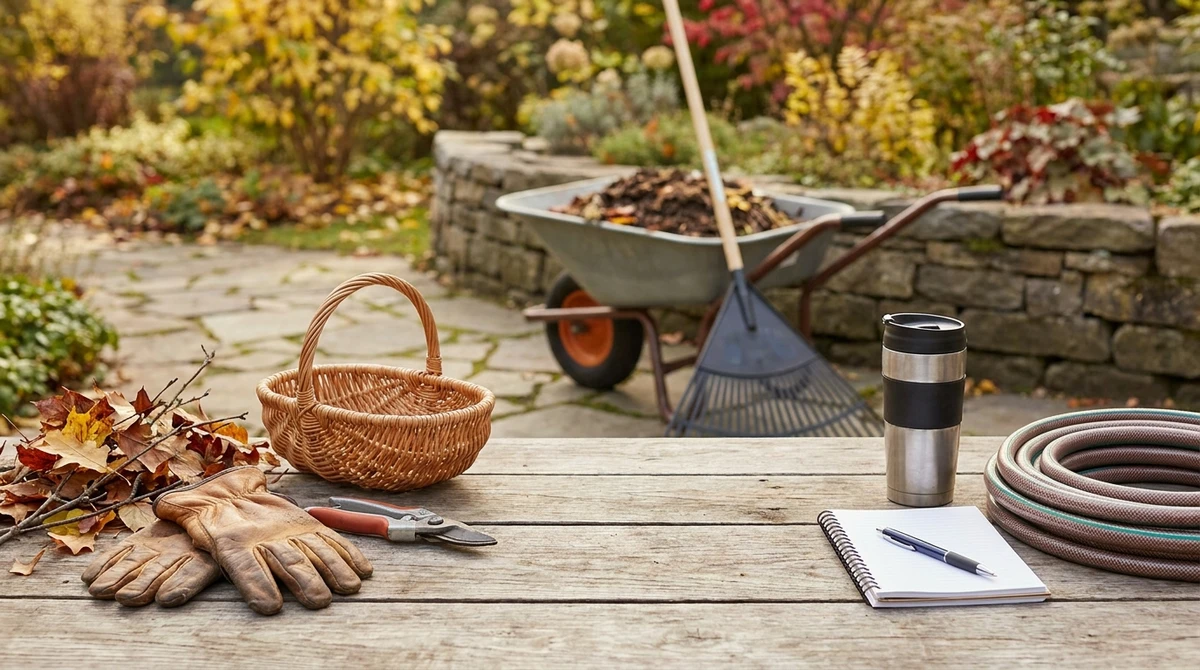
    Before I cut a single stem, I walk the garden. Not quickly. I carry a notebook and a thermos of tea, and I let myself notice things. The asters may still be buzzing. The Rodgersia might already be collapsing into mush. Those observations drive every decision that follows.

    Identifying which plants need special attention is really about reading the garden’s signals. A Monarda patch covered in powdery mildew goes on the “cut and remove” list. I do not compost diseased foliage. I bag it. Healthy seed heads, though, stay standing. Goldfinches work the Echinacea and Rudbeckia all winter long, and the structural silhouette of standing Sedum gives the garden bones when snow arrives.

    Soil assessment comes next. I take a trowel and dig down six inches in the vegetable beds, checking compaction and looking for earthworms. A simple home pH test tells me whether I need to adjust. Most vegetables grow best in soil with a pH between 6.0 and 7.0, slightly acidic to neutral, according to Michigan State University Extension. If my test reads below 6.0, I add garden lime. If it reads above 7.0, I work in elemental sulfur, though sulfur acts slowly and I adjust my expectations accordingly.

    I also note bare spots where a 2 to 3 inch layer of organic mulch would conserve soil moisture and suppress weeds without smothering plant roots, as recommended by the Royal Horticultural Society. I prefer shredded leaves for this purpose, raked from the lawn and piled around perennials. They break down by spring, feeding the soil food web rather than sitting inert like wood chips.

    Cleaning Up Debris and Weeds

    Removing debris and weeds starts here: clear spent annuals and diseased foliage first, leaving seed heads and standing stems where pollinators overwinter; pull weeds after rain when roots release easily; then mulch bare soil to protect it.

    I start with the obvious: the blackened tomato vines, the bean plants gone to paper, the zucchini leaves powdery with mildew. Anything diseased goes to the municipal compost pile, not my home bin. A hot heap might not reach the temperatures needed to kill pathogens, and I’d rather not gamble. Healthy debris, though, I’m more selective about. The hollow stems of Rudbeckia and Echinacea hold the larvae of native bees; I leave those standing through winter, seed heads and all, and clean them up in March when the insects have emerged.

    Weeds are the other half. After a good rain, I walk the beds with a fork, lifting taproots of dandelion and dock while the soil is soft. Annual weeds like chickweed and hairy galinsoga get pulled before they set seed. One missed plant can scatter thousands. I top the freshly weeded soil with a 2 to 3 inch layer of organic mulch, which the Royal Horticultural Society notes conserves moisture and suppresses weeds without smothering roots. Shredded leaves are my preferred material, though straw or composted bark works equally well. The mulch breaks down slowly, feeding the soil life that will be working all winter underground: the earthworms, the mycorrhizal fungi, the bacteria I never see but depend on completely.

    Mulching: The Key to Soil Health

    Mulching: The Key to Soil Health

    A fall cleanup is incomplete without mulching. Spreading a 2 to 3 inch layer of organic mulch over beds conserves moisture, suppresses weeds, and protects plant roots through winter. After debris is cleared, mulch is what feeds the soil and locks in the work you’ve done.

    I think of mulch as the garden’s winter coat. A 2 to 3 inch layer of organic mulch conserves soil moisture and suppresses weeds without smothering plant roots, according to the Royal Horticultural Society. I spread shredded oak leaves over my perennial borders. They mat down nicely and break down slowly, feeding the soil food web through freeze and thaw. Pine needles go around the blueberries and azaleas, which appreciate the slight acidity. Finished compost tops the vegetable beds, where most crops grow best in soil with a pH between 6.0 and 7.0, as Michigan State University Extension notes, slightly acidic to neutral.

    The choice of material matters. Cocoa shells are too rich and expensive for my taste. Wood chips are fine for paths but can rob nitrogen if dug in. I keep mulch pulled back from crowns and trunks; an inch of air space prevents rot. What goes down now becomes next spring’s humus, and that quiet transformation is the real point of the whole exercise.

    Preparing Plants for Winter

    Preparing Plants for Winter

    After the debris is cleared and the beds are bare, the real work begins, not tidying but tucking in. I think of this stage as the garden’s bedtime story: a little mulch here, a cutoff there, and a firm promise that the cold won’t bite too hard.

    For perennials, I leave the sturdy crowns of Sedum and Echinacea standing. They catch snow, which insulates the crown better than any blanket I could buy. Tender things like rosemary and lavender get a loose collar of shredded bark, nothing mounded against the stems. The Royal Horticultural Society recommends a 2 to 3 inch layer of organic mulch to conserve soil moisture and suppress weeds without smothering plant roots, and I’ve found that depth just right. Enough to buffer the freeze-thaw cycle, not so much that voles move in and treat it as a heated condo.

    Vegetables need their own send-off. I pull every last tomato and pepper plant, diseased or not, because solanaceous debris harbors blight. Then I test the soil. Most vegetables grow best in soil with a pH between 6.0 and 7.0, slightly acidic to neutral, as Michigan State University Extension notes. If mine drifts below 6.0, I add lime now so it has months to work before spring planting. A thin layer of compost over the emptied beds feeds the soil biology all winter, quiet, slow work that pays off the moment the ground thaws.

    Final Touches for a Successful Spring

    Before I even hang up the tools for the season, I pull a soil sample. Fall is the right time. Results come back from the cooperative extension without the spring rush, and I have months to adjust. Most vegetables grow best in soil with a pH between 6.0 and 7.0, slightly acidic to neutral, according to Michigan State University Extension (soil pH and its importance in the garden). If the pH is off, nutrients sit locked in the soil, unavailable no matter how much compost I pile on.

    Once I have the numbers, I sketch next year’s planting map. Crop rotation isn’t glamorous, but it breaks pest and disease cycles in ways no spray can. I keep a simple notebook: tomatoes where the beans were, beans where the greens stood. The RHS recommends a 2 to 3 inch layer of organic mulch to conserve soil moisture and suppress weeds without smothering plant roots (RHS guidance on mulch), so I lay that down now over the bare patches, letting winter work it in. Come March, I walk out to beds that are already fed, already mapped, already half-done. The garden feels less like a scramble and more like a conversation I started months ago.

    Takeaways: Your Fall Garden Cleanup Checklist

    Takeaways: Your Fall Garden Cleanup Checklist

    A fall cleanup comes down to a handful of essential tasks: clearing diseased debris and weeds, cutting back the right plants while leaving others standing for wildlife, mulching to protect soil, and winterizing vulnerable perennials and shrubs before the ground freezes.

    After thirty-plus years of putting gardens to bed, I can tell you that the work always feels bigger in anticipation than it does in execution. So start somewhere, anywhere. Pull the frost-blackened annuals from one bed, or rake the fallen leaves off the lawn and onto a border where they’ll do some good. Most vegetables grow best in soil with a pH between 6.0 and 7.0, slightly acidic to neutral, as Michigan State University Extension notes, so if you haven’t tested your soil in a few years, late fall is the moment to send a sample and amend before the ground locks up. A 2 to 3 inch layer of organic mulch conserves soil moisture and suppresses weeds without smothering plant roots, according to the RHS, and that depth matters. Too little and you’ve wasted your effort; too much and you’ve invited rot.

    The soil is the part I keep coming back to, because everything else, the cutting back, the tidying, the careful decisions about what to leave standing, serves the soil. Get that right and the spring takes care of itself in ways that surprise me every single year, even now.

    Frequently Asked Questions

    Frequently Asked Questions

    What tasks should be included in a fall garden cleanup checklist?

    A thorough fall cleanup covers removing spent annuals and diseased foliage, cutting back perennials that have finished, weeding, soil testing, mulching beds, cleaning tools, and winterizing irrigation. I also test vegetable-garden pH, since most vegetables grow best in soil with a pH between 6.0 and 7.0, slightly acidic to neutral, per Michigan State University Extension.

    What should be cut back, removed, or left standing in the garden for winter?

    I cut back disease-prone plants like peonies and bearded iris to the ground, but I leave seedheads on coneflowers, rudbeckia, and ornamental grasses standing for overwintering birds and beneficial insects. Hollow-stemmed plants such as salvias also provide shelter for solitary bees, so I resist the urge to tidy everything.

    When is the best time to do fall garden cleanup before frost or freeze?

    I begin fall cleanup after the first hard frost blackens tender foliage, which signals dormancy here in Zone 5B. Working too early can stimulate tender new growth that a later freeze will simply kill. Some tasks, like leaf collection and mulching, I stretch through November until the ground freezes solid.

    How should leaves, diseased plant material, and garden debris be handled or disposed of?

    Healthy leaves get shredded and composted or spread directly onto beds as a free mulch layer. Diseased material, anything with powdery mildew, rust, or leaf spot, I bag and discard rather than composting, since home piles rarely reach the temperatures needed to kill pathogens. I never burn; it wastes organic matter.

    What additional fall maintenance should be done, such as mulching, tool cleanup, and winterizing irrigation or containers?

    I apply a 2 to 3 inch layer of organic mulch, which conserves soil moisture and suppresses weeds without smothering plant roots, according to the RHS. Then I drain and store hoses, scrub tools with a wire brush and oil them, and move terra-cotta containers into the shed before freezing splits them.

    Sources